When you put so much thought and effort into a Halloween costume, why stop when you get to the trick-or-treat bag? I always try to customize a treat bag or container that coordinates with the costume.
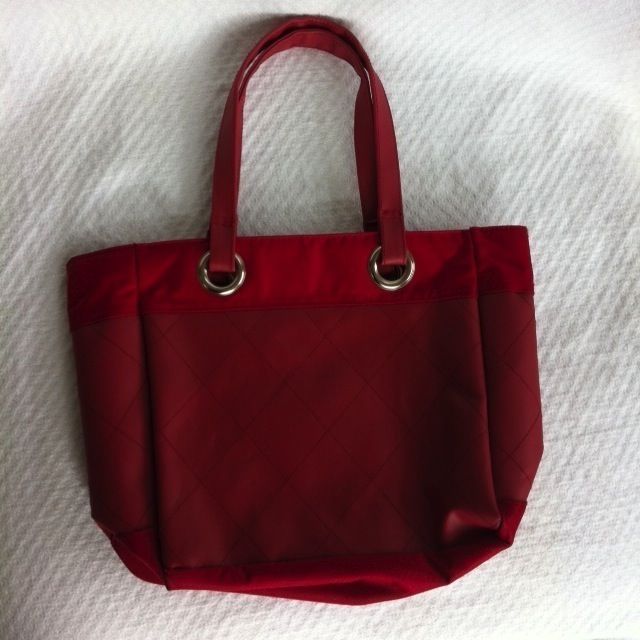
My daughter is going to be Cruella de Vil this year, so this post is going to show you how easy it is to personalize a simple $2 purse from the thrift store with a few trims I already had on hand to make a fancy, fun, and flashy treat bag that will enhance her Cruella costume. This is the purse I started with.
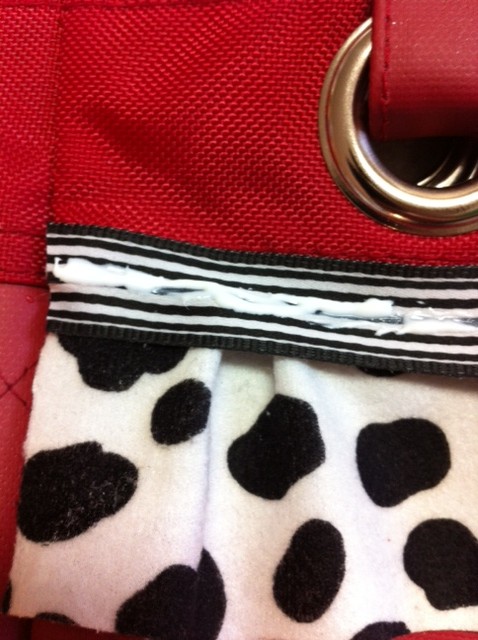
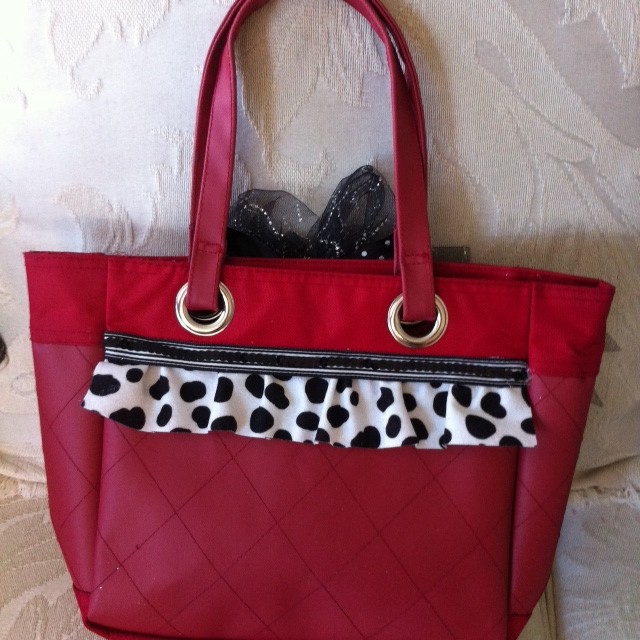
I cut a 2″ wide strip of dalmatian print fabric that was about 6″ longer than the length of the area where I was going to put it. This extra length allows for gathers. This was leftover fabric from the dalmatian print ruffle I added to the bottom of her dress to extend it to her ankles.
I used hot glue to first secure each end of the fabric where I wanted it to start and stop. I put a drop of glue in the middle to glue the fabric down. Then I ran a strip of glue on both sides of the middle and glued the fabric down, using my fingers to form gathers. My glue was super hot, so it was soft long enough for me to readjust the gathers as needed. The longer your strip of fabric, the fuller your gathers are going to be.
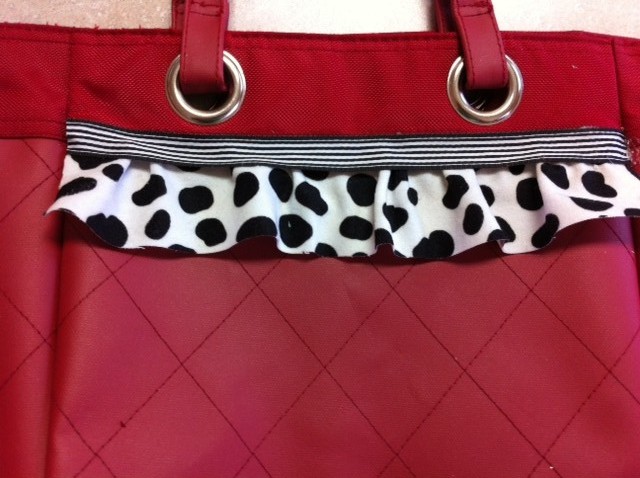
I cut a length of black and white striped ribbon to cover up the bare edge along the top of the gathers, then glued it down all the way across. I could have stopped there, but I didn’t. I like to add sparkle whenever possible, so I layered on a single strip of black sequin trim.
Because my glue gun is a mess,
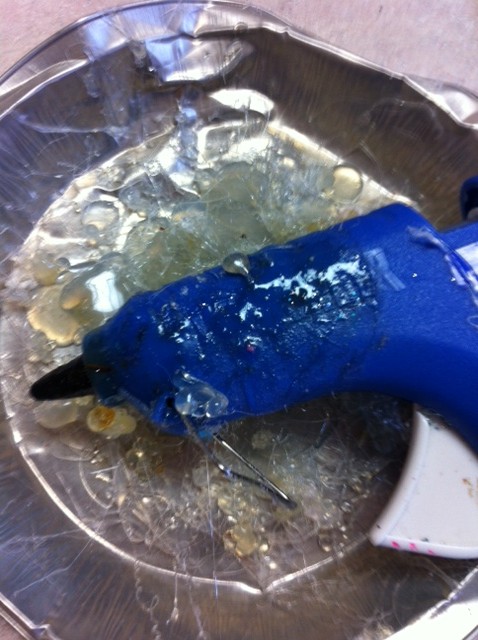
I was worried about excess glue getting stuck onto the ribbon since the sequin trim was so narrow. (Basically I just need to get a new glue gun.) I decided to use Aleene’s craft glue because it dries clear and I felt I had more control with it. The tip is perennially clogged, so I had to scoop out glue with a popsicle stick and use it to make a narrow strip of glue. I know, I am cheap. I just need to go buy a new bottle of Aleene’s glue also.
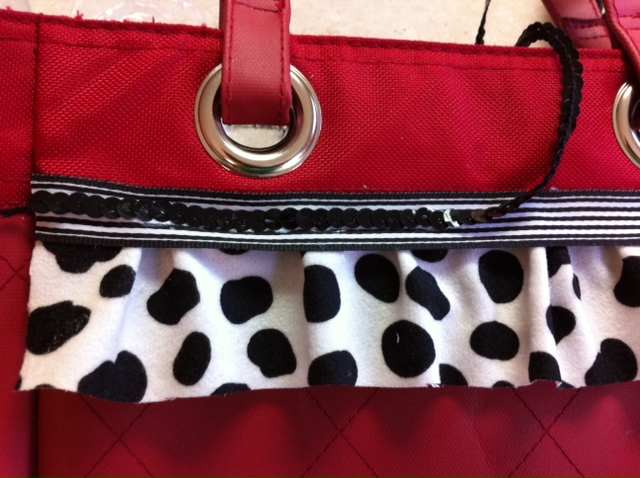
Make sure the ends are glued down nice and tight, then you can trim away any excess thread or sequins. I could have stopped HERE, but I didn’t. Once you get started doing a project like this, the possibilities are endless…
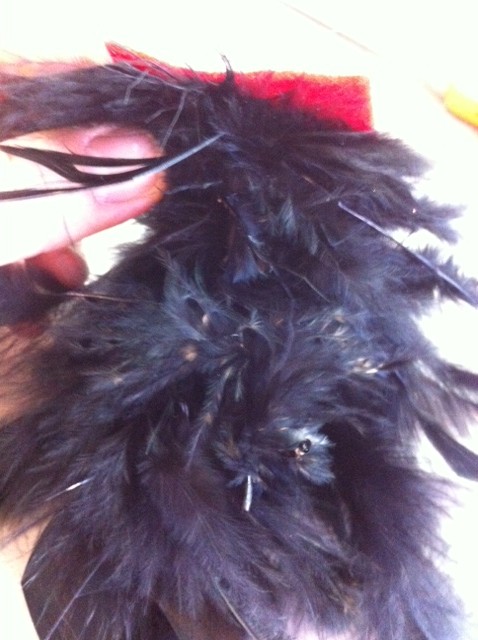
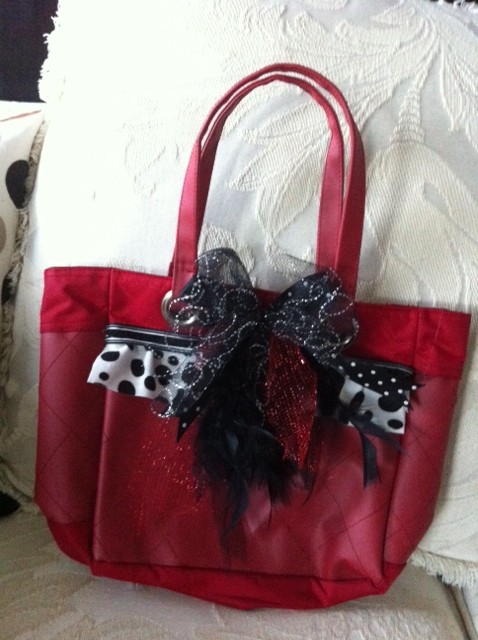
Now I thought it needed a pouf of feather boa and some other fun trim, so I snipped off 2″ of a black feather boa. Feather boas are AWESOME! They don’t unravel, they are cheap, and come in tons of fun colors. I glued the string of the feather boa (the part where the feathers are attached) to a 2″x 1″ piece of red scrap felt for a base.
Then I made a bow out of some random red and black trim from a pirate trick-or-treat bag my kids used a few years ago and glued that bow at the top of the feathers.
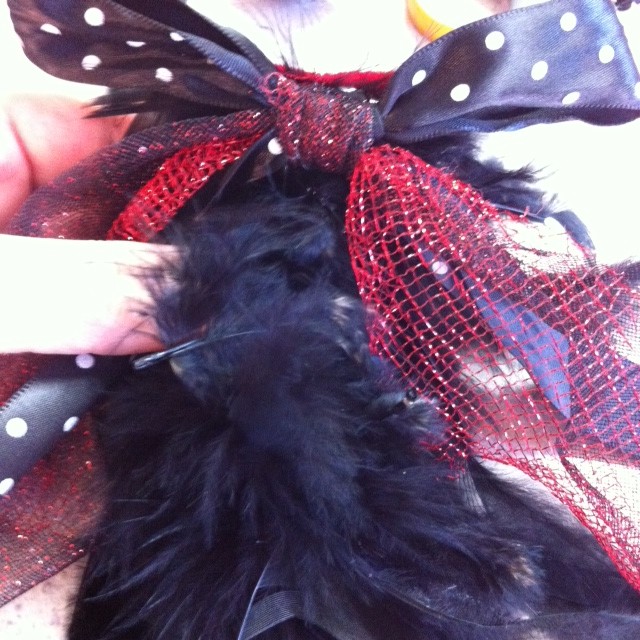
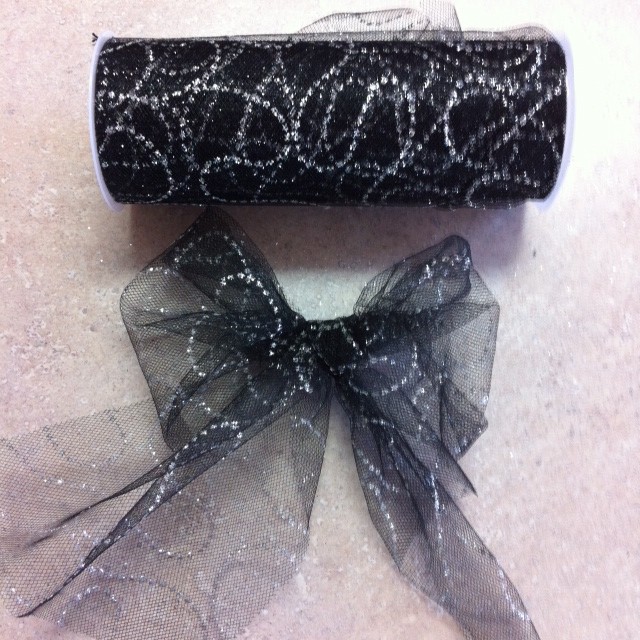
I still thought it needed something else to finish it off, so I made a bow out of sparkle black and silver tulle and glued that on top of the other bow.
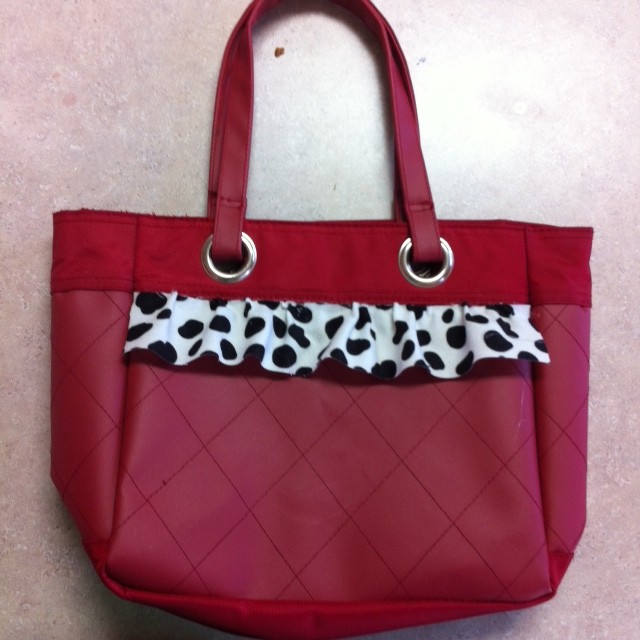
Ta-Da! I think I’m finished! The front and back of a boring old purse refashioned into a memorable trick-or-treat bag!
For more tips from my blog on how to make a personalized trick-or-treat bag, click here or purchase
my ebook here, “How to Create and Design a Halloween Costume” that has a section on customizing trick-or-treat bags for Halloween costumes. Don’t have a Kindle? Download Amazon’s free app here to read my book on any device.